Showing posts with label quilting. Show all posts

Thursday, October 29, 2015

Sister Sneak Peak (8/18/2013)

I can't keep this in - I AM HAVING SO MUCH FUN!  
Michele over at Quilts From My Crayon is hosting a swap called "It's a Sister Thing Swap".  I am having so much fun!  Did I say that already?  
I can't resist posting a peak of what I am working on right now.  Enjoy!
I can't wait for the reveal day!  I can't wait!  I can't wait!  
Happy dance :o)
woof woof meow

Tina & Gabi's Day and Night (4/11/2013)

Hi hi!  This post is long overdue…Tina and Gabi got their quilts a while ago, I’ve just been slow getting the pictures in a post and up on the blog.
Backstory:  I worked with Tina and when she was sent off for her job, I wanted to make her and her daughter matching quilts so that they would have a little piece of each other while Tina was gone.  Yeah, that didn’t happen before she got home.  At first it sat cut in strips.  Then it sat sewed into strips and cut into pieces.  Then it sat sewn in half the blocks.  Then it sat in all the blocks.  Then, they both got put together, on the Gammill and off to them all in the space of a few weeks.  It did all the previous sitting over about 14 months!
Pictures, pictures, pictures.  This is a pretty picture heavy post from here on out.  And, of course if I took pictures of the fabrics, I can’t find them.  So, we’ll start out with pictures of the blocks instead.  I used Eleanor Burns’ “Day and Night” pattern for both quilts.
Gabi's quilt has two colors, light pink and black.  Tina's has three: light pink, dark pink and black.

Here are the two blocks together.


Gabi's top with Tina's block in it.
Tina's top with Gabi's block in it.
The backing.  A pink flannel that screamed girlie girl on it.  Not sure about the "owl" on it though.
Tina's quilt loaded on the Gammill.
The quilting detail on Tina's quilt: loopy hearts.
More quilting detail on Tina's quilt with both blocks.
Gabi's quilting detail: loopier hearts.
More quilting detail on Gabi's quilt with both blocks.
Gabi's quilt finished!
Tina's quilt finished!
Oakleigh trying to help with the binding:  "You finished yet?!?!"
Annie in front of Tina's finished quilt:  "You're finished now Mom!"
woof woof meow!

A finish - Baby Henry's Quilt (2/11/2013)

Yay - this was a fun project!  Josh's cousins had their second child - a boy - in October and when I heard they were expecting, off I went to find a quilt to make for them.  Then, Melissa Corry blogged about her Snuggly Squares II baby quilt.  I knew it was the pattern I wanted to try for this baby quilt.  I scrounged around on the web and found a (very hard to find) Lily & Will II layer cake at Christa Quilts!.  I ordered it and when it got here, I was soooo excited.  So excited, it sat. And sat.  And sat.
Then, when I got to it, the cutting and piecing went really fast.  Then, it sat again.  When it is nice outside, I usually stay at home, go hiking, take the dogs to the river, ride my motorcycle.  So, the quilt top sat on the bed in the guest bedroom for months.  Molly was nice enough to sneak into the room when I could catch her and hold down the quilt top for me.  Sweet child...
Before I finally got to Tigard to use the Gammill, I sketched out what I wanted to do - bunnies, flowers and vines, to mimic the fabric patterns.  I found a bunny outline at Pixabella and sketched them in the centers of the single-piece blocks. 
The flowers went into the pieced-center blocks.
The vines went around the outside of each block and around the border of the quilt.
It went on the machine really easily - normally my lines are crooked as sin!
If I didn't live alone I would think someone else sewed the top for me ;o)
After I took it home, bound it and washed it, I took it over to my MIL's and asked for her to take some photos for me.  The quilting shows up pretty well on the back, but it doesn't photograph very well in the sun.
The front turned out great and Liz's photography made it look even better!
I loved working on this quilt and working on my skills with it.  I hope Baby Henry loves it just as much!
woof woof meow

Dare to Dresden ... with ME! (1/24/2013)

Hello hello!  Long time no see.  But I have been busy in my sewing room!  My latest finish is what I get to share for the Hop today!  First I want to say - Christine from Quilt Monster in My Closet and Mdm Samm from Sew We Quilt - ROCK!  You are experiencing another fantastic Blog Hop put together and cheered by them.  And, as for cheering, don't forget to visit the rest of the fantastic bloggers that I am sharing my day with and show them some bloggy love:
When I saw that there was a Dresden Blog Hop happening, I knew I had to jump in.  I had purchased an Easy Dresden Ruler a while ago after seeing a few blogs and tuts (like this one, this one, and this video) that made Dresdens VERY intriguing.  So, a hopping I went :o)
I pulled a charm pack out of the back of my fabric cabinet and picked up a neutral background for whatever was going to come out of this unknown adventure.  Followed the instructions from a few tuts and voila!  Easy peasy blades - 80 of them.  20 make a plate, so I figured I could make three whole plates and put the four quarters of the fourth into the corners of a table runner.  For each blade, I pointed the bottom as well since I wanted to leave the inside of the plate open to see the background.  Inspired by *surprise* Melissa Corry's quilt here.
Yeah, my math never was great and it didn't do me much good here.  So, I only had room for the three whole plates.  Cool - off I went!  I stitched with coordinating thread around the outside of each plate, then the inside as well.  Then, just for some fun, I stitched down a couple blades on each plate.
 After I got them stitched down, I made my sandwich and brok two nails basting the durned thing.  Had a little trouble with the quilting - I forgot to take the painters tape off my machine table and kept getting the backing caught.  Luckily, the quilting is the same color as the background and I can't see the goofiness unless you're really looking.
I bound the whole thing in the same color as the background during lunch at work and hung it on my blinds to take the final pics.  I think I like the way it looks on my sewing table though... :o)
I am going to use the rest of my background fabric and the remaining plate pieces to make a couple placemats, haven't decided on two or four yet.  I don't know when that will happen...definitely before our quilt show this Fall, I want to put them out together.
Thanks for sharing with me today - my project isn't as inspired as some of the other projects - A-M-A-Z-I-N-G - that my fellow bloggers are putting out, but I had a lot of fun and definitely know I will be making more in the future.
Have fun on the hop and at the other blogging sites.
woof, woof, meow

A Wicked Day! (10/25/2012)

Hello everyone!  Welcome to AnnieOak Designs' day on the Wicked Blog Hop - I am very excited to share what I put together for you.

First, I want to say Thank You to Madam Samm and Wicked Wendy for organizing and hosting this Wicked Blog Hop.  Click here for the whole schedule - all 8 days worth of some wickedness that is scary great! 
I am sharing this Frightful Friday with the following bloggers. 
AnnieOak Designs  <---That's MEEEEEEEEEE!
Make sure you visit all their freaky-cool sites and leave some bloggy love!
When Madam Samm and Wendy announced this blog I jumped at it.  Thinking I would do some creepy-crawlies and bats on a wall hanging, I set out looking for some ideas and patterns.  But...my mind kept going back to a play I had heard about.  You guessed it, "Wicked: The Untold Story of the Witches of Oz".  Now, I had and still have, only HEARD about it.  Never seen it, never read the book, never even checked it out on the web.
While looking for my creepies and crawlies, I came across this book from That Patchwork Place, Spellbinding Quilts: Wizards, Witches and Magical Characters to Paper Piece.  Uh, can you saw right up my alley????  So, I bought the e-version and flipped through the patterns for some inspiration.  There were a couple of neat little configurations, but nothing really jumped out at me.
Back to the Wicked Musical image searches.  And BAM!  There was a great selection of photos of the background and this dragon. 
www.cheechunfoo.com
And there was this photo of the two witches.
www.glogster.com/sunshineskittles
I had the inspiration and the ideas, so off I went to my graph paper and after drafting a quick sketch of what I "wanted" to do, I headed off to Fabric Depot.  Remember the post where I gave you a sneaky-peaky of the Boo-ty I got there?

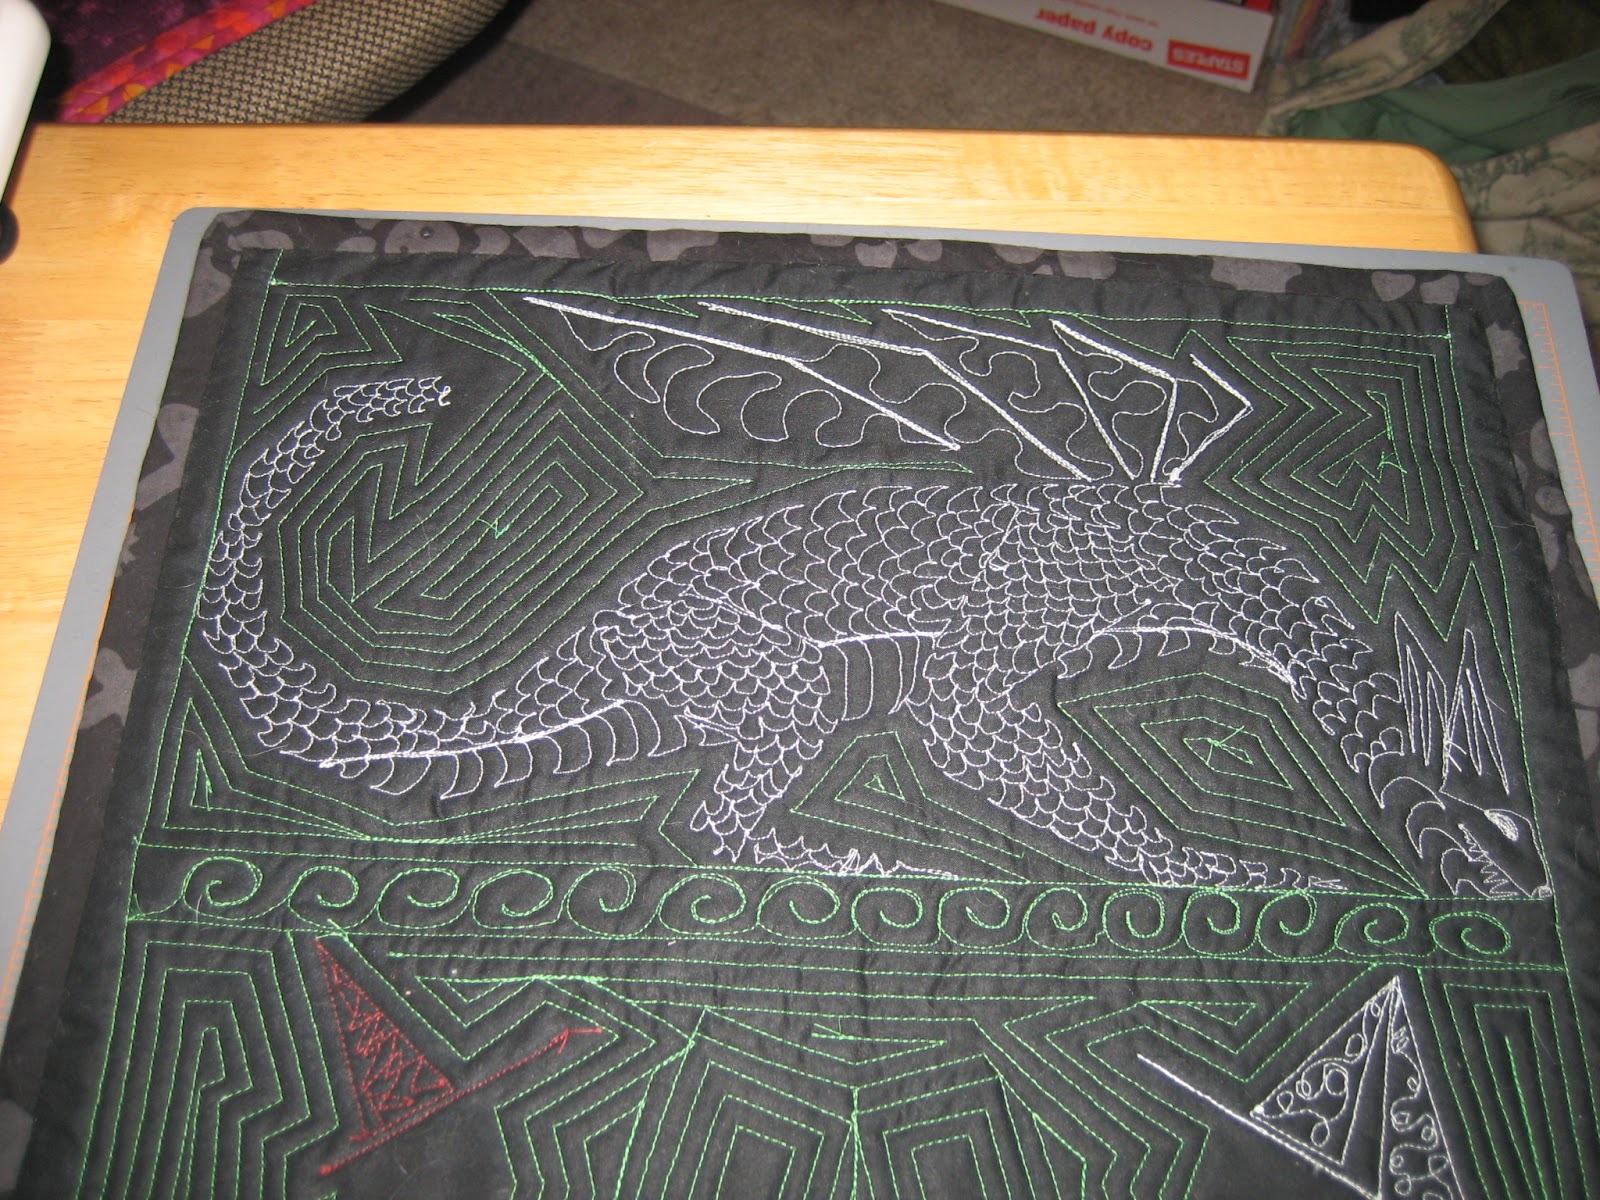
Here is what I came up with for the dragon.

And Glinda, the Good Witch of the South.

And Elphaba, the Wicked Witch of the West.

They all went together for a quick quilty snap-shot of the stage and the Wicked name.

I did FMQ on the entire thing and had a blast doing it.  There is echoing,

 some regular meandering and some angular meandering

and scales on the dragon.

The back looks just as cool as the front, don't you think?

Now, what is a blog hop without a giveaway right?  I am going to be giving away 6 fat quarters of orange and black fabrics to one lucky winner to help celebrate the end of the Wicked Blog Hop and Halloween (oh and the fact that the Beavers are 6-0 right now!).
All you have to do is:
1.  Leave a comment on your favorite Oz character (Wicked or Wizard of Oz).
2.  For a second entry, be a follower and let me know!
Please, please, please: No-Reply Bloggers make me sad, sad, sad.  I love all of your comments and when I can't reply back (or send a great giveaway gifty), I get sad.  Booh.  So, leave your email if you are a No-Reply Blogger and actually want a shot at the giveaway.  I'll ship anywhere - all my followers rock!  I'll pick a winner 1 November.
So, remember to visit all the other Frightful Friday bloggers and leave bloggy-love.  And make sure you come back on Nov 1 to see if you won the giveaway!!!
woof woof meow

A Giveaway Winner! (9/26/2012)

Sorry this is late - I got into an accident Saturday afternoon on my motorcycle and haven't been up to typing much!  Thank you to everyone who participated in the Dots on Dots Blog Hop and for the wonderful comments and NEW followers too! First the finished runner. 
I had fun making this!  Definitely going on my table :o)
On to the Giveaway Winner:
Beautiful! Stars and dots... does it get any better than this? I don't think so! lol

Your tablerunner is going to be a stunner.

Thanks for sharing and being a part of this hop!
Congratulations Katherine!!!  Your FQ are in the mail and you should see them soon!
Off to the sewing room - I have my next hop due on Oct 2!!!  Gonna take me a while, but I'll get it done.  Stay safe folks!!!

Dotty Stars and Giveaway (9/10/2012)

Hello fellow blog hoppers!  Today is the first day of the Dots on Dots Blog Hop hosted by Corrie of Quilt Taffy and Mdm Samm of Sew WE Quilt!.  Both are fantastic blogs and resources and I am excited to be part of this Blog Hop - I've lurked for a while and decided to jump right in, so I hope my first attempt goes well!  I know all the other particpants are awesome, make sure you check all their blogs out and give them some bloggy love too! 
Here's today's schedule:
AnnieOak Designs (that's me!) 
The full schedule can be found at Quilt Taffy here.
Now on to what I did.  I've been wanting to make a table runner for a while so I thought this would be a great opportunity.  I pulled out my trusty block book and went to work finding a star I liked.  I chose the Fifty-Four Forty or Fight block and sketched out the table runner in my notebook.  Figured out the amount of fabric and off I went.  I needed four colors to make the block work.  I am a JoAnn fan when I need something quick (a trip to a LQS would be an entire day and I am not shy about admitting that), so I wandered over and found these three coordinating dots fabrics and a navy to pull it all together.
Since the table runner called for three 12.5" unfinished blocks and some borders, I cut everything out.  Never used my Tri-Recs rulers before and turns out, they are pretty handy.  Thanks Nancy!
Then off to sewing. 
Fifty-Four Forty or Fight Block
I said I wanted a table runner right?  Well, I also wanted to try my hand at machine quilting with my Juki and I figured this would be the perfect opportunity (plus it seemed like a lot of work to get the thing on Diane's longarm for a lot of little work).  I pin basted it and being the control freak that I am, sketched the block out in my notebook and played around with the quilting designs until I liked what I had on the paper.
On with my machingers and off we went!  I started by stitching in the ditch around the stars and doing a dotty/pebbly motif in the navy areas around the stars.   
Pebbly Navy (sorry - the flash is aweful)
And this is as far as I got. 
Almost all the way!  2 out of 3 blocks done.
Ran out of thread.  This being my first attempt at machine quilting on my Juki I neglected to over-purchase my thread.  So, I am not going to the store tonight, so it lays unfinished, hanging over the bannister staring accusingly at me every time I go up and down the stairs.  I will get it done!  I has been too fun to do and I want to finish it before I start on my next project.
Now to the giveaway.  Since I am a stasher I ALWAYS buy more fabric than I need for a project.  What if I mess up a block?  What if I want to add to the pattern as I go?  Gotta have the wiggle room right?  Right.  So, I am giving away a fat quarter of each of the four fabrics I used for the table runner.
Just leave a little comment in the comments section and I'll pick a random winner at the end of the Dots on Dots Blog Hop, September 21.  For an extra entry, be a follower and leave me another comment telling me you are a follower.
Now, your next assignment is to check out the rest of the lovely blogs on the Dots on Dots Blog Hop!  Don't forget to leave bloggy love!

Sue's Back! (4/9/2010)

Well, she has slowed down enough to do another giveaway. Sue and Wayne (her DH) are family friends and have an online quilt shop, http://www.alderwoodquilts.com/. While Liz, Nancy and Diane have all had influences on my interest in quilting, Sue really made it accessible simply because she let me sit at her booth and was available for questions.

I started this blog for several reasons, but Sue's blog has shown me what I can do with it. Thanks Sue!
Here is a photo of the first quilt I ever finished that Sue had a huge hand in....I sat in front of a sample of this quilt during the Santiam Scrappers Quilt Guild Quilt Show. Sue has the pattern, "Celebration" by Marilyn Foreman for Quilt Moments (http://www.alderwoodquilts.com/shopping/Category.asp?c=patterns_quiltmoments&p=1) By the end of the show, I had to have it so I could make it for my mom. She cried when she got it in the mail. Hee hee. Love you Mom.

I finished another quilt! (3/8/2010)

So I took a class at Callapooya Quilts (http://www.callquilts.com/) in Brownsville two weekends ago just for fun. I had never taken a class and wanted to see what I could learn/get out of one. The teacher, Judy Clay, was awesome! The shop is great, a great big room with high ceilings and wood floors. They have several "shop dogs" so I didn't feel any qualms about bringing Annie and she was a very good girl. Marty, the shop owner even said she was a delight to have in the shop. *this is me dancing*

Anyways, the quilt we made is from a book called Turning Twenty Around the Block (http://www.friendfolks.com/store-detail.php?ID=1) and is made from twenty fat quarters - too easy! I talked a co-worker and her mom into taking the class with me and we had a really good time. Nichole had never made a quilt before but knew how to sew so I was confident that her quilt would turn out. So between the three of us, Nichole was in good hands. Judy was a great teacher and very patient with all of us - everyone is different and has different styles of working so anyone who can work with all those different styles is good in my book. So after four hours of cutting, the first class was over and we had homework to do! Mary and I put together most of our blocks, actually Mary finished her quilt so she was able to help Nichole with putting her quilt top together. The second class was all about putting the top together and I got all my blocks together. When I got home I put the borders on and was ready to quilt it!
Friday night when we went to Beaverton, I stayed at Tom and Diane's and quilted my quilt on her Gammil longarm. It takes a lot out of you but I think I am comfortable enough to start quilting designs now, I plan on starting this with a foundation pieced wall hanging I am donating to the Owen Denny Chapter of Pheasants Forever (http://www.owendenny-pheasantsforever.org/). Our breeder is a member and sponsor of this years banquet and asked me to donate something. I made her a wall hanging when we got Oakleigh from her.

Anyways, back to the Turning Twenty quilt. I had a lot of fun doing this quilt and I think I am going to do it again, it was super easy and I had some ideas for new color combos. I am going to donate the quilt to our Lebanon Altrusa Scholarship Fundraiser in April as a silent auction item. I hope the $50 reserve price doesn't price it out of the auction though. Here is to another good quilt! I am excited and hope it does well :o)